This Was Made Using AI and a 3D Printer

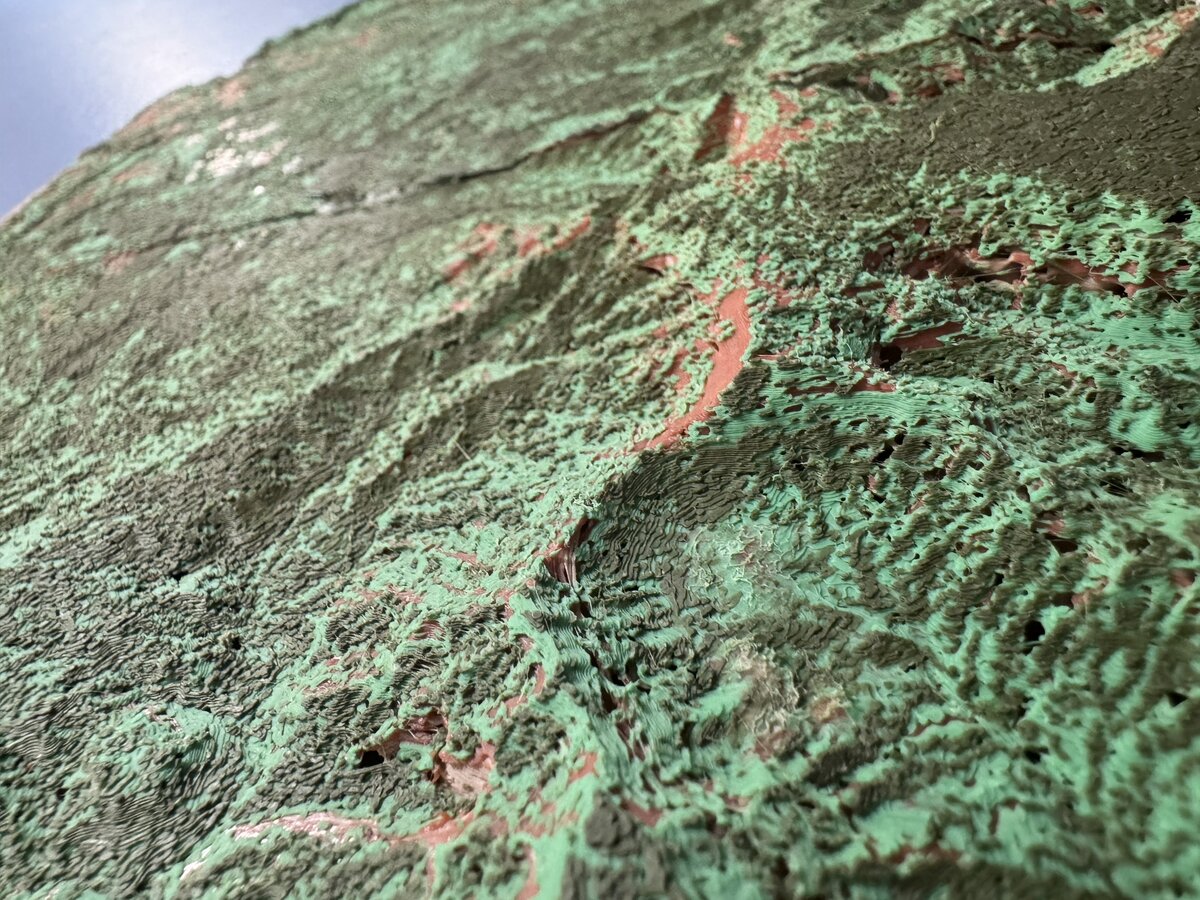
This piece was produced on a consumer 3D printer using just three filaments: blue, black, and white.
There are no gradients, no paint, and no post-processing.
The depth, color variation, and surface detail all come from geometry controlling how light passes through the printed volume. This post explains what this object is, how it was created, and how AI made it practical to build.
What You're Looking At
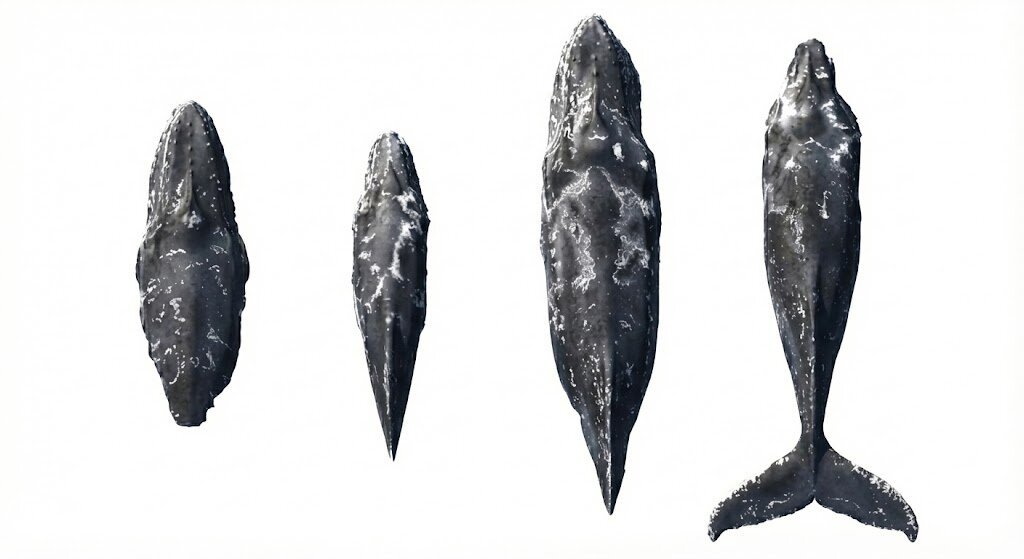
This is a 3D-printed panel depicting whales breaking the surface of the ocean.
The whales have real depth. The surrounding water has surface texture, turbulence, and splash detail. Color varies smoothly across the scene despite the use of only three base filaments.
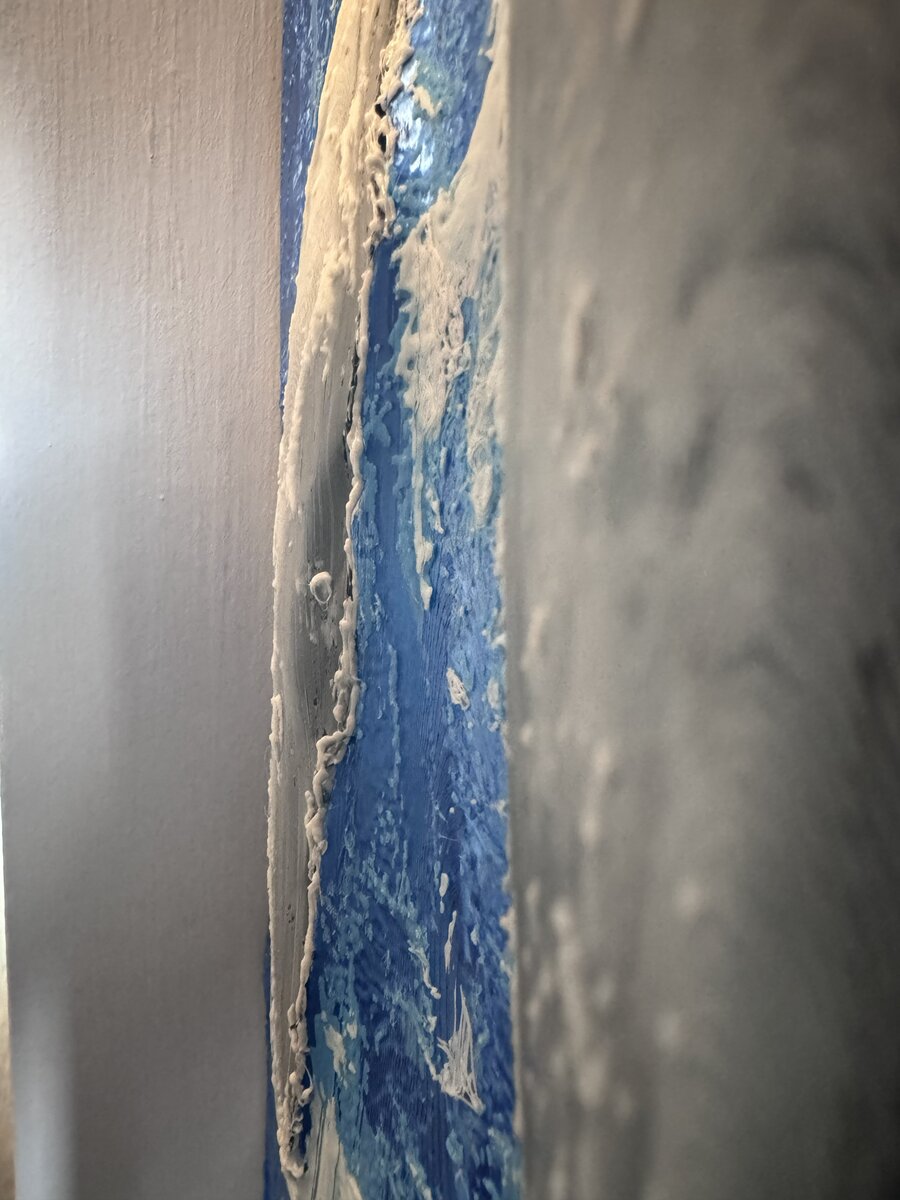
Nothing here is painted or textured after printing. The color and shading emerge from internal structure and material thickness, not from surface treatment.
The technique used to create this is something I've been developing called Deep-Volume Lithopanes.
Geometry as a Color Control Mechanism
Different filaments transmit and scatter light differently. Even among similar materials, the distance light travels before diffusing varies in predictable ways.
By characterizing those transmission distances, geometry can be used to mix colors inside the volume of the print.
In this piece:
- blue, black, and white filaments are sufficient
- intermediate colors emerge from internal mixing
- color transitions are controlled by geometry rather than gradients
From Image to Volume
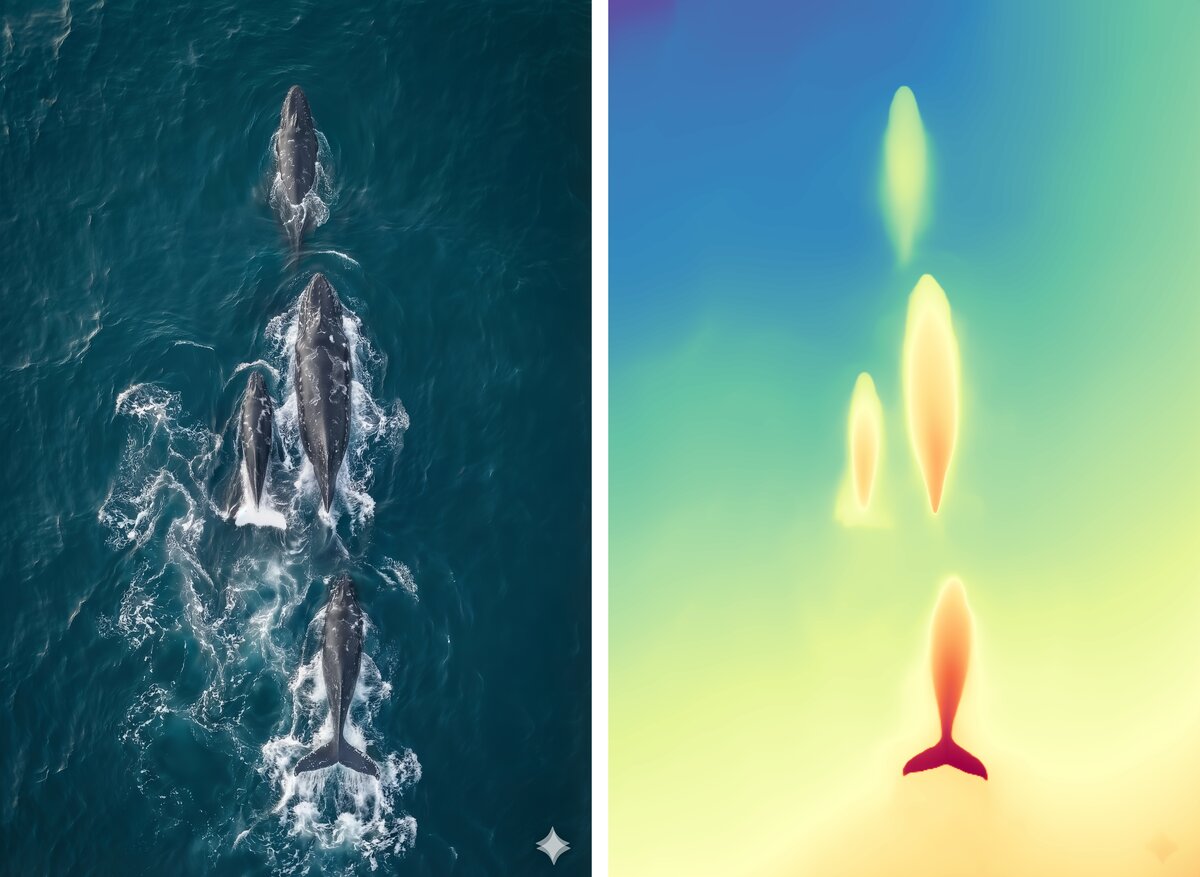
The original whale imagery contains strong specular highlights caused by wet skin and sunlight reflecting off the ocean surface. Those highlights don't represent material color and shouldn't influence geometry. An AI-based image cleanup step (Nano Banana) was used to remove reflections and highlights, leaving only albedo - the color information appropriate for physical encoding.
Depth for the whale forms comes from Depth Anything V2, an AI depth-estimation model that infers dense depth maps from a single image. The result is a smooth displacement field aligned with the source image and suitable for geometric processing.
For other experiments, the same pipeline works with externally sourced depth data. For example, terrain-based prints use elevation maps provided by US government datasets.
Different sources, same downstream geometry problem.
Finding a Geometry That Prints Well
Several geometric approaches were explored before arriving at the one used here.
Earlier methods produced results that looked reasonable on screen but failed in physical prints, showing issues such as:
- visible layer artifacts
- broken depth continuity
- poor color reproduction
- slicer errors or fragile geometry
Through iteration, a method emerged that consistently produced clean prints while:
- minimizing artifacts
- preserving smooth depth transitions
- maintaining continuity across color regions
- producing geometry that slices and prints reliably
Combining Surface and Depth Using Contours
Both the surface texture and the depth field can be treated as topographic maps.
Once quantized to discrete printer layer heights:
- the surface becomes a set of surface-height contours
- the depth field becomes a set of displacement contours
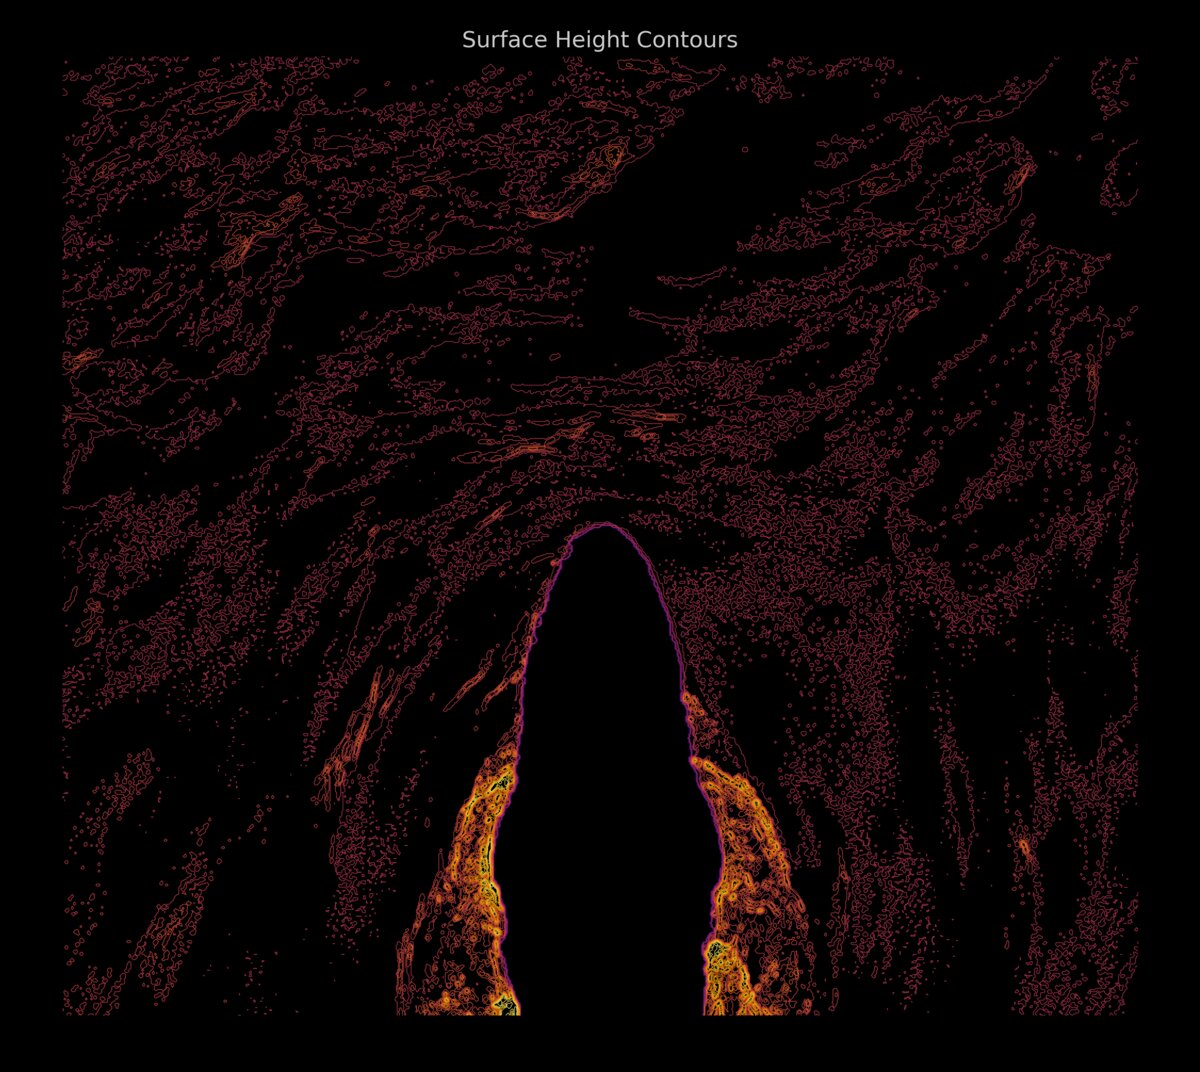

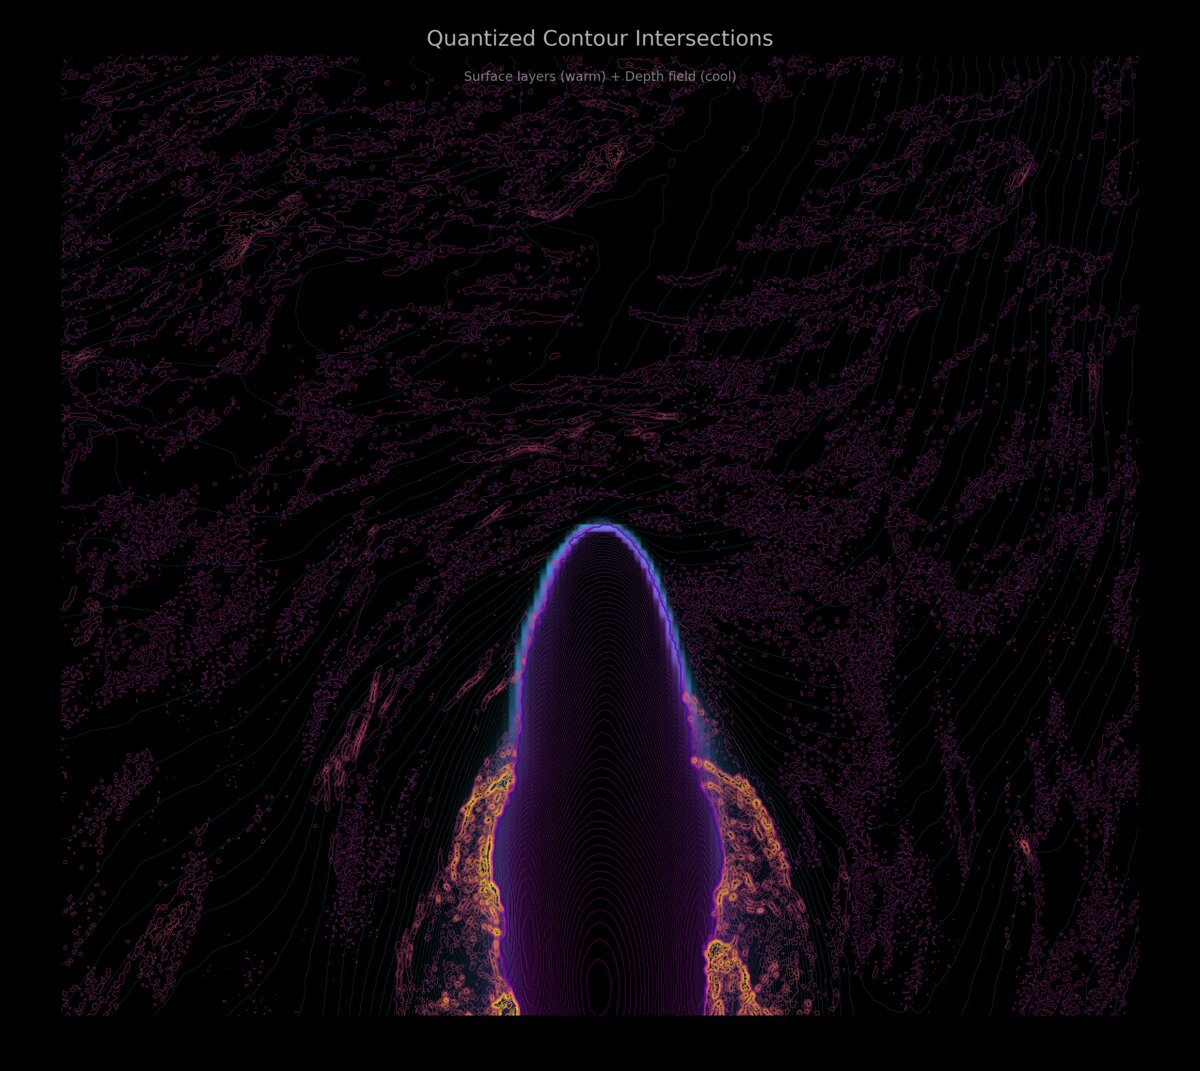
By computing intersections between these contour sets, the model is divided into regions where surface height and depth are constant within a layer.
Each region is extruded as a simple solid with flat boundaries, producing watertight geometry that aligns directly with how the printer deposits material.
The final model consists of thousands of these regions tiled together into a single printable volume.
Why This Approach Avoids Artifacts
Interpolated meshes often introduce sloped faces and ambiguous geometry that look fine in a renderer but cause problems in slicing and printing.
Working directly with quantized layers avoids:
- stair-stepping from angled surfaces
- overlapping or non-manifold geometry
- unpredictable color transitions across layers
The printed result closely matches the modeled geometry.
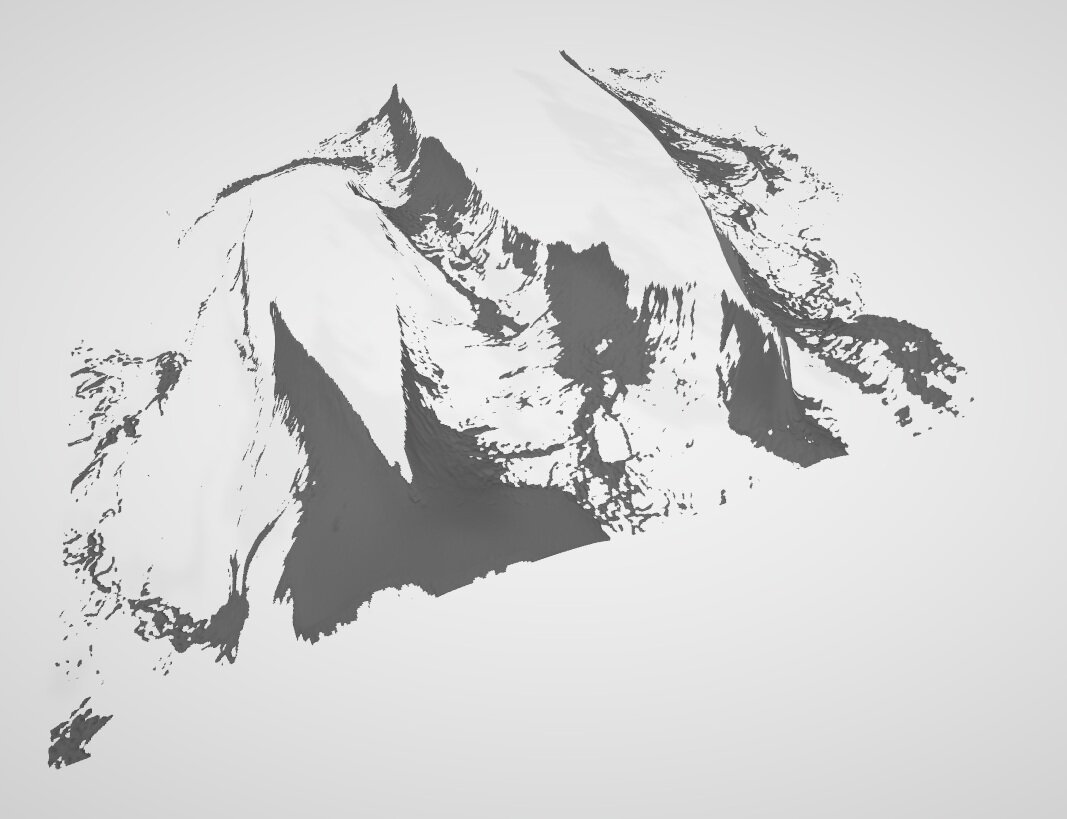
Beyond Whales
The same pipeline works for a wide range of inputs, including:
- satellite imagery
- terrain and elevation data
- scientific and measurement datasets

Kauai is one example where elevation data was converted into a deep-volume lithopane using the same techniques described here.
How This Was Built
All of the work described here was implemented using Claude Code agents, orchestrated through MobileVibe.
That setup made it feasible to:
- iterate quickly on geometric approaches
- generate and test multiple variants
- inspect failures and refine assumptions
- converge on a method that prints reliably
The core ideas still require understanding of geometry, optics, and additive manufacturing constraints. The agents reduced the overhead of experimentation and iteration.
Why This Matters
This work explores how AI-based perception and geometric modeling can extend what consumer 3D printers are capable of producing, without modifying the hardware.
By encoding depth, texture, and color into printable geometry, it becomes possible to create objects that were previously impractical on this class of machine.
I'll share the results of more experiments soon.